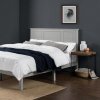
DIY Rustic Style Panel Bed for under $200! —— UPDATE Bed #2!

Jerzsubbie

Senior Member
Charter Member
Benefactor
Life Member
Multi-Factor Enabled
Joined
Dec 16, 2016
Messages
10,584
Location
Mooresville
Rating - 100%
85   0   0
The wife and I decided to get rid of our cheap furniture in our spare bedrooms, one being an ikea set and the other a decent laminate wood set I got off CL while in college. Nothing is really wrong with them so we’re giving them to a friend, who could use it, for cheap.

We like rustic style stuff and my wife thinks I’m Bob Vila’s long lost son or something. I’m NOT a finish work guy but I decided to take a shot at building the pretty straight forward bed.

I basically wanted to build a solid wood copy of this bed. The sample bed’s headboard alone goes for $180 and is made of MDF and photo transfer coated. I set out to do the whole bed out of softwood for less than that.
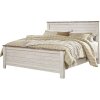
268CDEFD-9675-4C44-A76E-6A9FA643E72E.jpeg

Tuesday I bought my materials: 4x4 posts, 1x6 panels, 2x6 rails, 1x4 trim caps, 1x4 furing base, 2x4 panel top/bottom and base support.
Wednesday I did all of my cuts and pocket holes, mocked up the footboard
EC2B8C7C-B13F-46A1-93E0-38FB1E25EF47.jpeg

Thursday I did the sanding w 120 grit and basic assembly
78A57322-DF6A-4826-BF8C-901ADF76D600.jpeg
7A5D08A7-E567-4A0D-953F-11945E96AADC.jpeg

Friday I was exhausted from the work week and didn’t touch the project.

Saturday I did the painting, 2:1 killz latex primer/water
7885FD0F-1132-411C-A3D0-82C13201B9AD.jpeg

Sunday I stained the trim caps and polyurethanes everything. The white all got 3 coats of satin and the stain got 3 coats of gloss, sanded with 320 between coats. (Pic before poly)
A9EBBACC-F71A-4D01-8BE8-F170F66AFFE5.jpeg

Finally tonight I attached the stained trim pieces and bed rail hardware, and brought it upstairs.
C31396B4-E18C-4DE9-AAFF-B37F72474B09.jpeg
686CA7E2-3822-4408-8F65-D43B3070D920.jpeg
Project complete!

Now the wife is waiting for me to build the next one, different style. :confused:
 
Good job!
Nice use of the pocket screws.

I would have done the top rails in the same style as the rest but nice.
 
Good job!
Nice use of the pocket screws.

I would have done the top rails in the same style as the rest but nice.
Thanks!
I thought the same at first but thought it lacked enough detail/depth without the extra “step”. The top and bottom pieces of each panel is simply a 2x4 that I ripped off the rounded edges.
Another thing about the panel construction... I didn’t like the flex in the panels so I decided to use some scrap 1x4 furring to support them from 2x4 to 2x4. Since the top of the 1x4 could possibly be visible, I wood puttied and sanded the top 2 holes on each. With the depth I set the panels on the 4x4 posts, the 1x4 braces lined up perfectly flush with the top cap trim. The braces had the side benefit of pulling the panels more flat/smooth.
 
Last edited:
UPDATE

So the first bed went so well that I agreed to make a 2nd. This one has to be 100% completed and installed by dinner time yesterday since my GMIL was coming with the in-laws and would need to sleep in that room.

This was the inspiration.
FC91DAF5-12C5-4ECF-975F-3A5ABAC2BB2E.jpeg

We wanted a weathered grey finish so I tried Minwax weathered grey stain, “dovelight” grey paint, and 50/50 paint. The stain was terrible with one coat and I didn’t have time for multiples. I decided on 50/50 paint/water and wiped it off after 45-60 sec. it came out perfectly!

Materials overview:
1/2” birch ply for the headboard
1/2” concave shoe moulding to hide the plywood edges on the interior of the design
2x4 posts & feet
2x6 rails
1x4 base cross members supported by a 2x4 up the center
2.25” pine moulding at the top of the headboard
1x4 pine top cap on the headboard, ripped to 3 1/8”

This is a double/full-sized bed in our smaller bedroom and replacing an IKEA platform bed so no boxspring and I didn’t want to buy one.

Bought my materials Sunday, did all of my cuts and mock-up that day. Monday I assembled the headboard glueing and finish nailing the pieces together, then put a 1x4 brace at the top and bottom of the backside, then used pocket holes to attach the 2x4 posts.
40F0205F-89BC-4E41-B749-46B82062C1A7.jpeg
600E2052-C3B3-4648-AB98-740112A9C621.jpeg

Tuesday I sanded everything and assembled the footboard and rails, then had to get the painting done.
73228EED-31C3-4868-9ECD-C7A3F743BFAC.jpeg

I was rushing a little so that I could get 2 coats of polyurethane down on Wednesday, sanding with 320 between coats.
D01AF473-38F7-47B7-B84E-012AFFA63F74.jpeg 0A52E131-C930-41C6-AEF2-B2C23B79453C.jpeg

It came out great and the wife is again very happy with it!
92696F93-F15C-40A5-97FD-4067E2BE7BE9.jpeg
8637425E-605A-4309-88DD-D25FC3D81E31.jpeg
 
Last edited:
Started nightstand #1 tonight. I’m able to make it out of all scraps from the 2 beds. Only have to buy drawer slides and a knob.

This is the inspiration. It’ll be finished to match bed #1.
0090F3F9-14E4-4B4A-9EC6-7CD7A117A512.jpeg 55FF8312-4CDB-423F-9688-A6BEA7705236.jpeg
 
Well the nightstand took a bit of a backseat for 8 weeks as I was kind of burnt out with furniture after rushing to build 2 beds and began remodeling the laundry room.

Finally got back to it this week and finished it up tonight. I did get a new HomeRight Super Max HVLP sprayer from Rockler which made the poly MUCH easier to apply to the white base! $90 well spent.
E08EA861-6CBE-45E9-AE25-2659D42AD2F8.jpeg

The whole thing is made from pine, matching the bed, except for the drawer box which was made from scrap birch ply. I actually used some rougher 1x4’s for the bottom shelf and like how it came out, adding to the rustic feel. Stained parts got 4 coats of gloss poly, sanding with 320 in between, and the white base got 3 coats of satin poly. And I used full extension ball bearing slides for the drawer.
5EDCF9E8-319E-46BD-9EE5-8E8CE4C58A49.jpeg
 
Last edited:
I see you live in Huntersville. Originally from from New Jersey?

That’s amazing talent for a guy who was not capable of pumping his own gas in his home state.
 
I see you live in Huntersville. Originally from from New Jersey?

That’s amazing talent for a guy who was not capable of pumping his own gas in his home state.
Lol funny story about my first time trying to pump gas in PA on a college road trip...

But thank you!
 
Back
Top Bottom