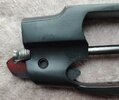
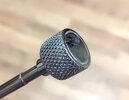
New BP Project

Windini

Meatcake
Charter Life Member
Joined
Dec 17, 2016
Messages
10,608
Location
WNC
Rating - 100%
44   0   0
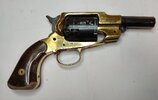
I decided (a while ago) to make a BP Bulldog out of a brass-framed FIE 1858 Remington. Finally made some progress this evening.

I couldn't find the pics of it in its as-bought condition (used); the loading lever was probably not original & didn't function well - it bound up instead of traveling freely. It didn't appear bent, just poorly fitted. Test firing went ok.

It's been sitting around dismantled for quite a while as I tried to decide if it was worth ordering new parts for. It ain't! So here we go...
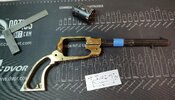
FIE 1858 Start.jpg

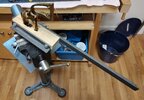
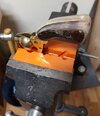
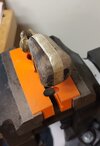
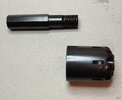
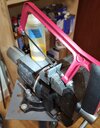
I decided to make it a 3-1/2" bbl. That would leave me plenty of room for a front sight of some kind, as well as give me some leeway for smoothing and squaring up the cut if my aptly named hack saw influenced my application of elbow grease.
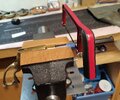
FIE 1858 BBL Cut.jpg

I cut a little rough on the side that my hand was blocked by the vise, but it wasn't too bad. It squared up easily enough. I'll work on the crown and perimeter edges later.
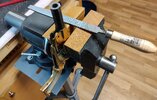
FIE 1858 BBL Flat & Smooth.jpg

Side view to compare to original length. I'm stealing being inspired and influenced by a quick-release arbor pin holder that's available online now and again. I want to make it out of brass (which I've not seen offered) to match the frame, Current plan is to blacken the brass.
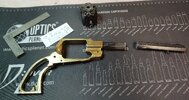
FIE 1858 BBL Shortened.jpg

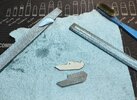
Then came the fun part. Holy Sulphurous Smoke! That sucker was HARD to break loose! I'd tried before (and made my tre' chic Homer Homeowner DIY frame wrench!), hit it with Kroil any number of times, then set it aside. Today, I cooked it but good with a butane chef's torch... 3 times... with more Kroil between each "firing." I had the Kroil bubbling up out of the threads while heating it, and it would ooze through the frame, but it still took so much force I felt sure I was gonna twist or snap the frame!
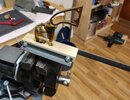
FIE 1858 Home Made Frame Wrench.jpg

It finally came loose - and I didn't even bloody myself on the vise! :) Ah, sweet success.
FIE 1858 HM Frame Wrench Success!.jpg

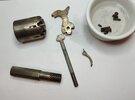
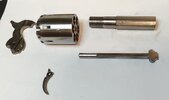
I cleaned the Mobil 1 off the innards (mostly). Here's where it stands after this evening's efforts.
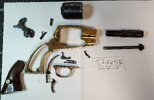
FIE 1858 New Config Parts.jpg

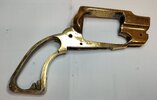
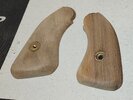
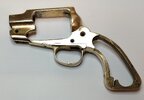
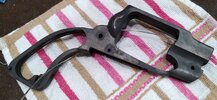
It's hard to see on the white background, but I marked the corners of the grip frame with a white Sharpie to define the upcoming rounding of the grip; I will shape the walnut panels to match after I strip the finish off. I may make some new panels out of maple or faux ivory. The Bulldog will have a dark finish - I'll blacken the brass and re-blue the cylinder, barrel, arbor pin - so I think light colored grips would set it off nicely.

I'll bring the hammer & trigger back to white, then probably do a faux case hardening on 'em, depending on how the steel reacts to the chemicals. Ya never know what steel them 1960's & 70's Italians used for these "I Saw The Outlaw Josey Wales and Now I Want to Look Like a Cool Cowboy Renegade on the Cheap" models...

If I ever get back to it, I'll update this post!
 
Had an hour to spare, so I worked on rounding the grip frame a little. I think it needs a little more, but I don't want to get too close to the grip panel posts and make a weak/thin spot when I reshape the walnut panels. I could cut them off, redrill closer in, and add a steel pin, but then I'd either have to fill the existing pin holes with epoxy & hope they didn't show after shaping, or just make the new maple or other new panels.

FIE 1858 Rounding of Grip Frame.jpg

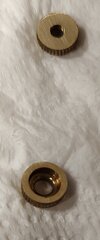
No pics, but I also farted around with some brass bits & Birchwood Casey Super Blue. A washer held the color after 2-3 dips, a thumbscrew did ok after a second wiping with alcohol (guess I missed some oil first time around), but a piece of hardware store brass rod would not hold the black. Even after scotch brite treatment & a deep clean & rinse, 80% of the black would wipe right off.

Obviously alloy particulars will have a significant influence on the longevity & durability of the finish. We shall see.

@DangerRuss , got any brass (yellow bronze?) blackening tips?
 
@DangerRuss , got any brass (yellow bronze?) blackening tips?
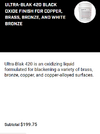
Hey! Yes. My parents had orders where they needed to do this in the past, just depending on what the customer wanted. They always called it “black oxide”, so I looked that up just now. It looks like black oxide is the end result, and not the actual product you need.
I believe they used something like this…
I believe there may be a birchwood Casey product that is different than the one you were trying…
Whatever my parents used in the past, they ordered it from MSC industrial. I will look this weekend to see if they might have any of it still sitting around at the Foundry.
 
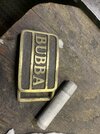
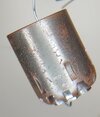
This picture is the best example I could find. In this belt buckle, they darkened the part, and then polished off the top surfaces. The belt buckle is dirty in this picture, so everything looks dull. I’ll see if I can find any other examples when I’m at the foundry this weekend.
1699924247209.jpeg
 
Any ideas as to how to secure the cylinder pin?
Yeah, that's what this is (*ahem* will be):

Pin Retainer.png

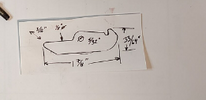
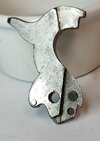
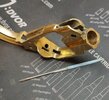
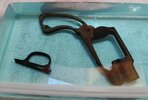
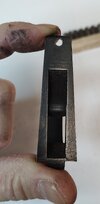
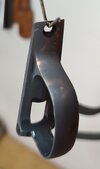
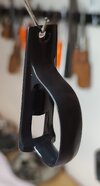
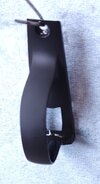
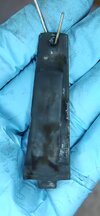
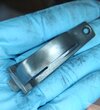
I traced a commercially available quick release for an 1858 & plan/hope to make one out of brass. It has a 1/8" hole (socket) in the top flat that houses a small sprin & detent; that pushes against the top of the channel in the frame just enough to keep the hook over the arbor pin. To release, one pushes up on the bottom flat, compressing the spring as the device pivots on the screw, and the hook drops down allowing the pin to slide out.
 
The Tinkering continues.

Worked on cleaning up some of the steel parts this morning.

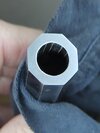
Smoothed the cut face of the BBL, cut the crown & removed the interior & exterior burrs.

To 320 grit:
FIE 1858 BBL Crown 320g.jpg

Polished enough - 600 grit:
FIE 1858 BBL Crown 600g.jpg

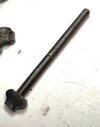
Found a slight bend in the arbor pin. I think this explains the change in the cylinder gap, as noted by my white pen >0.011" notation beside 2 chambers that pinched a 0.011" feeler gauge. A few taps with the yellow plastic face of a no-mar hammer cured that right quick.
FIE 1858 Bent Arbor Pin.jpg

Evidence of use! Gas cutting on arbor pin on the spot just below the cylinder gap. Not bad enough to worry over.
FIE 1858 Arbor Pin Gas Cutting.jpg

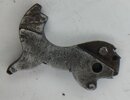
Hammer is a good indicator of the overall quality of the FIE brass framed 1858 Remington New Model Army... functional, but yeesh. This was a big part of the "New Parts? Nah; chop it up!" decision.

Hard to see in this picture, but I sanded, filed, and stoned off the more offensively coarse burrs & peened edges. No, I did not alter the notch geometry!
FIE 1858 Hammer Coarse Machining.jpg

Everything needs a degreasing & the blued bits are itching for the Evaporust bath. I'll reassess the faux case color finish idea once I get these parts cleaned up. I'm not sure if the colors would hide or heighten the proto-RTF on this Italian Stallion Mule.
 
Got a little more done today.

Continued "refining" the grip alteration.
FIE Bulldog Grip refining 1.jpg

I started on the brass after removing the wood grip panels. While trying to smooth out & reshape the slight arc in the back strap, it occurred to me I might be rounding the edge of the brass too steeply. I put the panels back on and, sure enough, I had created a few slight spots where the wood didn't line up with the brass. Fortunately, I caught it before it was too bad. I put the panels back on and resumed shaping & refining them together.
Fie Bulldog Grip Refining 2.jpg

I pulled the steel parts out of the Evaporust. It took care of the rust as well as most of the original bluing. The screws will get cold blued; they're soaking in degreasifier (alcohol) for now.
FIE Steel Parts After Evporust.jpg

The steel parts responded well to the wire wheel. Shiny!
FIE Bulldog Steel Parts After Wire Wheel.jpg

The hammer has a lot of texture, but looks good enough to at least attempt the faux color case hardening.
FIE Bulldog Hammer Better Than Expected.jpg

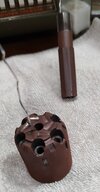
Got the first coat of rust blue compound on the cylinder & barrel. There's one spot on the barrel that didn't immediately respond to the solution; I may have to de-blue it with vinegar, degrease again, and start over. We'll see.
FIE Bulldog Cylinder & Barrel Bluing 1.jpg
 
I used to think acetone or denatured alcohol was enough to decrease with. Niceolddouble showed me it wasn't. I now decrease with a good scrubbing of regular dishwashing soap and bon ami. It changed my bluing game.
Do you mix them, or wash with dish soap and then do the Bon Amí?

Just so happens I have both on hand...
 
Do you mix them, or wash with dish soap and then do the Bon Amí?

Just so happens I have both on hand...
I squirted the dawn on the wet sponge and then covered that with bonami and started scrubbing.

It was on a a set of barrels that were in the white. I started to get frustrated because the more I scrubbed, the more brown the suds turned. I was like WTH, I didn't think there was that much oil on the barrels. It wasn't oil, the barrels were so clean they were rusting immediately and the rust was turning the suds brown. They were flash rusting 🤯
 
Last edited:
Ok, had a setback, but got it corrected and I'm back on track.

Turns out the "one spot that didn't immediately respond to the bluing solution" was a tad more Derp than my tentative analysis indicated.

To put it mildly...

Barrel blues
FIE 1858 Barrel Blight.jpg

Yeah, that's a "no."

Well, at least the cylinder...

Aw crap.
FIE 1858 Cylinder Blues.jpg

Maybe I'll just cold blue the screws I left sitting in alcohol...

Newp. Note to self: uncovered alcohol evaporates.
FIE 1858 Red Threads.jpg

Not gonna lie: my worst bluing start evah.

Back to the Primordial Soup with you!
FIE 1858 Back to the Bath.jpg

Ok, so - what to do now?

Well, like any super smart Bubba TinkererSmith, I'm gonna follow secondhand advice I got from a feller on the internet, who got it from another feller on the internet! ( @cold1 ) What could go wrong?!
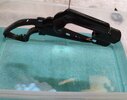
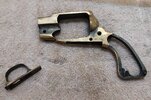
FIE 1858 ReDeGreasery.jpg

Nothing! This is what it was s'posed to look like! Ok, Dawn and Bon Ami are my new bluin' besties. (I did revert to acetone to degrease the #0000 steel wool & carding brush bristles.)

FIE 1858 Better Blue.jpg

Ok, ready for boiling.
FIE 1858 Steel Sauna.jpg

Hot Fuzz!
FIE 1858 Cyl Carding 1st Boil.jpg

Nice base color! (Whew!)
FIE 1858 Cylinder Bluing 1.jpg

Round 2!
FIE 1858 Cyl & BBL Round 2.jpg

The barrel was still a little damp when I took the last picture; I think the uneveness on the front facet is more a trick of the light than another bad coat. I guess I'll know tomorrow.
 
Last edited:
I struggled with the bluing (again). While that first treatment looked promising, subsequent runs were disappointing. This was my most problematic attempt at bluing so far! I don't know if I contaminated the bluing solution, if it "expired," if the early 1970's multiple cottage industry sourced steel was wonky, or if just blew it... but the second and third treatments actually exaggerated the inconsistent splotches and streaks rather than blending them into an even finish.

"Balls!" said I, and determined I would have to start from scratch again. I also knew I'd have to card and oil both cylinder & barrel in order to stop the rusting until I could get back to them. Good labor after bad. Grr.

Lo and Behold! A Christmastime miracle!

They done turned out ok.
FIE 1858 BBL & Cyl Bluing Results OK.jpg

Def not my best work, but perfectly adequate for what it is, at least for now. The carding plus a heavy coat of oil left overnight evened everything out surprisingly well.

I then twisted some stainless steel scrubby pad ribbons into a bronze brush, added mo' oil, and proceeded to ream the sh... rust & residue outta the bore and cylinder chambers.

There is still some light scarring/pitting here and there, but nothing debilitating. It's fine considering the pedigree (i.e. lack thereof), age and abuse this ol' thang came saddled with. (One might draw a parallel between the thing and its owner. One would not be wrong.)

Surfing the wave of momentum, I went after the brass frame - knocked off sharp edges and deburred some hole perimeters and the rolled edges where the ill-fitted rammer once elbowed its Fellinian way to drop a load in as many chambers as it could reach.
FIE 1858 Brass Frame Smooth Burrs & Edges.jpg

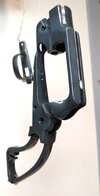
I then took it with me when I went to my storage to locate and/or fetch the chemical stripper for the walnut grip panels. I wire-wheeled the frame and trigger guard, but the wheel I have is too coarse to give a final finish. I need to get a .008" or .006" wire wheel to give me a satin sheen before The Blackening. (@DangerRuss !) No pics; it now has a uniform-ish texture, but needs refining.

Of course, I got back and realized I had completely forgotten to even look for the stripper. (Perhaps she went and joined the Pole.) So I attacked the grip panels with hand sandpaper.

And stopped when I saw I had abraded through (slightly) to one of the frame alignment pin holes on the right side grip panel. You can see it in the lower right if you look closely.

I caught it in time. I'll pack it with some Aussie wood filler from the backside (heh), then sand it smooth when it dries. After I chemically strip the remaining finish off, I'll raise the grain, fine sand, dye, and oil or varnish them. I'm confident the hole will disappear. I may make a new set of panels for it... eventually.

Still need to get brass stock & make my quick-release arbor pin retainer, do the faux color case hardening on the hammer, trigger, and arbor pin, and figure out some kinda front sight for it.

But it's coming along!

FIE 1858 Grip Panel Work.jpg
 
Last edited:
As for the trouble bluing, I reblued my 1980s era CVA Hawkins barrel a couple of years ago. I used Laural mountain to rust blue it. It was the most difficult bluing job. I had colors in the first rust that I had never seen before and hope never again. There were copper and gold colored streaks. There was some rust that wouldn't convert at all and stayed red. I had to go back to white metal twice and change over to Mark Lees slow rust blue. The barrel is still streaky if you get it out in the sunlight.

I think the European black powder guns use a leaded steel for the barrels. I have read that the leaded steel is easier to machine and is very difficult to rust blue. It will take hot blue just fine though.
 
I think the European black powder guns use a leaded steel for the barrels. I have read that the leaded steel is easier to machine and is very difficult to rust blue.
That's good to know about, thanks. I think the first attempt was just not degreased properly. The second attempt revealed streaky weirdness!

I'm using Brownell's recreation of Pilkington's formula, and it has been great up to now. I'd been (re)using a small plastic tupperware-like storage container for the solution so as not to contamnate the main bottle. But even after wiping it out thoroughly, some brownish crusty bits showed up (dried solution?) and made me wonder if whatever volatiles in the mix had evaporated out, changing the characteristics of the remaining liquid.

I also had some whitish, almost dried-salt-like residue form on the rusting steel, which I'd never seen before. One such area began to etch a spot on the barrel; even after pretty firm pressure with 0000 steel wool, the outline of the spot remained. It faded with oiling, but is still visible.

It was a good lesson, and came out well enough this time! But I need to get a new bottle of rust solution - I'll look for the Mike Lee's product.
 
I tried to move on to another task, making the cylinder quick release/arbor pin retainer. I imagined it to be brass, but couldn't find any 3/16" brass bar stock locally. Grainger had it, and cheap, too! < $9, but I had to order it and estimated arrival at my local branch is Dec 20. Hm. Patience is not Windini's strong suit...

So I went to Lowe's and bought a 3' piece of 3/16" x 1" mild steel.

I made a pattern by tracing the Taylor's one I have onto a piece of carboard, then tracing that onto the steel with a blue fine point Sharpie. Using a mini hacksaw, I started roughing it out.
FIE 1858 Cyl Release Steel 1st Attempt.jpg

I cut the major lines, and began filing to final shape. I use blue chalk to "lube" the file teeth and keep the chip clogging to a minimum.

FIE 1858 Cyl Release Steel & Pattern.jpg

It's coming along, but this may turn out to be a learning project rather than a final product. In hindsight, I shoulda oughta drilled the holes through the side first (one for the retaining screw & one to define the curve of the arbor pin retaining "hook"). The screw hole won't be hard, but I lack the machine and talent to drill overlapping an edge, so a needle file will have to do.

I'll get this one cut & try fitting it to the frame... then probably correct my mistakes on The Sequel. If I get one that looks decent & functions, I'll polish it up and do the faux color case hardening on it, or maybe try heat bluing it. The more I ponder that, the more I like it; it'll be a nice color accent to the blued bbl & cylinder and the blackened brass frame & trigger guard.
 
Last edited:
Got some brass blackening solution from @DangerRuss over the weekend; thought I'd play Junior Chemist today!

I ordered an 8" dia. x .006" wire wheel from Grainger because the old 6" x .014" wheel I have mounted is down to about 5" diameter and, I thought, a bit coarse. I figured the 8" wheel would be outside the diameter of the motor housing and thus be easier to work with (large parts tend to bump the motor when the brush is too small).

I got the email & went & picked it up yesterday. Turns out that, while it was easier to work around, it produced a coarser finish than the "coarse" wheel! I guess it was because the new wire ends were still sharp; I bet they'll cut a smoother finish once broken in a bit. So I did the best I could with the other. I worked the inside curves and tight spaces with a teensy weensy, well-used, brass-coated steel wire brush on a dremel.

But after a good degreasing (dish soap & Bon Ami again!), I thought it looked pretty good.
FIE 1858 Frame & Trigger Guard Wire Wheeled.jpg

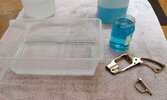
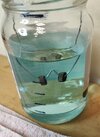
I RTFM'd! Then prepared a 20% solution. I measured the amount necessary to cover the parts in my particular container (Sterilite storage bin) with plain water first. The total came out to 5 pints, one of which was as pretty a blue as the eyes of a Polish Blonde in Braunschweig, Deutschland.
Brass Blackening Solution Prep 20% Ratio.jpg

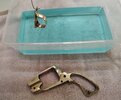
Bathtime!
FIE 1858 Blackening Ready.jpg

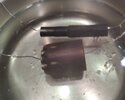
Stuff works quick! This picture was taken as soon as I could get the camera up after gently immersing the frame (which went in last), maybe 20 seconds. The destructions said to leave parts in for 3-5 minutes, or until they're the color you want.
FIE 1858 Blackening Fast Action.jpg

After about 3 to 3-1/2 minutes, I thought it looked good.
FIE 1858 1st Blackening Promising Results.jpg

Dang it. 90% of the black wiped right off.
FIE 1858 1st Blackening Disappointment.jpg

Though disappointing, the results were educational. I noticed that some of the black was sticking fairly well; it was on the areas I had used the small, Dremel-mounted brush on, like the inside of the trigger guard.
FIE 1858 1st Blackening Trigger Guard Interior.jpg

So... back to the drawing board, but more experienced and wiser!

After cleaning & degreasing, I put the parts into a vinegar bath so the acid would etch the brass surfaces. Partway through the soak, I degreased some 0000 steel wool & gave everything a light scrubbing to loosen and remove as much of the old blackening as I could. I figured it would take a while, since the white vinegar I have is typical Cuisine de Leon brand, 5% strength. So I left it about 7 hours before thoroughly rinsing.

Round 2
FIE 1858 2nd Blackening Ready.jpg

I left them a full 5 minute and then some this time.

Shazaam! They lookin' good!
FIE 1858 Bulldog 2nd Blackening Results.jpg

This time, I didn't handle them at all while fresh from the solution or even wet. I used aluminum wire to lift & move them through a cold water rinse, then hung them to dry. Tomorrow (I hope) I'll test a small area and, if ok, I'll spray lacquer or some other sealer on them before handling.

Everything looked really good while wet, but as the water receded, I noticed a flawed area. It looks like a little archipelago as seen from 10,000 ft or so. I lit the frame up with a flash to make it show. The finish looks reddish brown in the pic, but it looks deep black in the real world.
FIE 1858 Bulldog Blackening close up inense light spots.jpg

It may turn out to be too fragile a finish for a pocket piece that gets handled a lot. If so, I may further my Artisan education by taking Cerakote 101 in the School of Hard Knocks.
 
Ok, so I let 'em dry...

Reasonably uniform result, covered in a fine black powder.
FIE 1858 2nd Blackening Result.jpg

How about the trigger guard?

What the ...?!! I don't get no respect! :mad: :D
FIE 1858 No Respect!.jpg
No, that was not staged!

Anyway, how durable is it this time? Time to test a hidden area. First, a gentle rub, then a light brush with some 0000 steel wool, then a touch with a carding brush, and... Hmmm!
FIE 1858 2nd Blackening Hmmm.jpg

The skeleton-y looking part of the inside of the back strap - that's not a brash brass color!

A little further testing on the top, i.e. hidden part of the irreverent trigger guard. Brassier, but not too offensive (despite its earlier gesticulation!)
FIE 1858 2nd Blk Test Carding.jpg

So a little more carding on the you-know-what side:
FIE 1858 2nd Blk Trigger Guard Carded.jpg

Dang! :) This is not bad in and of itself! But it isn't the goal. I'll file that knowledge away for future use and get back on plan.

Ok, I want the brass blackened, preferably uniformly so, and it should be somewhat durable or topcoat-able, which loose powder covered ain't. So I knock the fuzz off and... y'know? This isn't steel, but it's behaving an awful lot like rust bluing. Well, if it's gonna act like rust bluing, might as well treat it like rust bluing!

Once more into the breech Pickle!
FIE 1858 2nd Blk Fine Pickle.jpg

About 5 minutes later:
FIE 1858 2nd Blk TG Heck Yeah.jpg

Heck yeah! Nice and uniform blackness again!

After drying:
FIE 1858 2nd Blk TG On to Something.jpg
I might be on to something. Pic is a little out of focus, but the 2nd treatment is uniform, appears "denser," and is a softer matte finish. It is acting for all the world like steel being rust blued, just without the step of boiling to convert red rust to black.

I have yet to card this'n, but will do so and see if the black stays put a little better. I will keep doing treatments until I either fail or get the notion that it is building depth like bluing. I am only working on the trigger guard for now; the frame is a more complicated shape, so I want to determine this is a viable process/result before I get into that level of work.

IF this produces a result similar to rust blue, then I will try soaking the trigger guard in oil and rubbing down, a few times if needed, to see if it'll stop bleeding black. If so, I may not need a topcoat.

Windinyfus is happy.
 
wonder if the finish would harden if you boiled it?
Hm. This is a learning project, so maybe I will try it.

I just happen to have acquired some other brass bits that I was intending to try this finish on. They would have been practice material, and saved me the learning curve on the actual pieces.

However, they were "as cast," and, after filing away some flash and working a few spots, I realized it would take me quite some time to get the texture even close to that of the frame & TG. As it turns out, that wasn't simply laziness - the texture seems to be a key part of the finish qualities, similar to @Sharps40 's mention of "tooth" for topcoats.

The smoothier the surface, the flimsier the bond of the blackening. I suspect the cast parts would have given me a false sense of the effectiveness of the blackening to start with.

And with all the labor I saved, I got time to post essays on CFF! :rolleyes:
 
You thought I'd gone Distracto on this, didn't ya?

You would be largely right, though I made some progress after all.

In our last episode, Trigger Guard gave me the finger and the once-treated frame was waiting in the wings.

The TG had become my training wheels piece; I figured I would (try to) work out the blackening process & issues on it before I tackled the more complicated shape of the frame. There were still some spots and yellow brass showing on some corners and edges, so I decided to keep going.

Another bath, another carding; rinse, repeat.

It started to get a little weird:
Fie 1858 TG Lookin Rough.jpg

But it cleaned up right nice!
FIE 1858 TG But Cleaned Up Nice.jpg

Time to switch to the frame. It showed a few discolored spots around some screw holes after I carded it, so I thought I'd try a suggestion I got from someone on another forum.
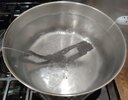
FIE 1858 Frame Boiling.jpg

I hoped it would even out the finish, maybe harden or toughen it up a bit. At the very least, I thought it would help boil out any residual oil from screw hole threads, if that had been the issue.

But no real change that I could see.
FIE 1858 Frame Boiled Result.jpg

Still, it didn't appear to have hurt anything.

Back in the soup a few more times! Incidentally, I gave up on the carding brush - even though it is an official carding brush, with super fine & gentle steel bristles - and have been using a soft, fine nylon bristle toothbrush. Pepsodent, it calls itself. I believe it came from a box of bathroom stuff from my parents' house, and this was my dad's. That he passed in 2005 and I still have it is an accurate measure of my Packratism! He most certainly would approve of its use for this project. He was an inveterate cheapskate tinkerer (apple don't fall far from tree) as well as a Cowboy Action shooter! :)

Ultimately, it came out rather well. So I oiled it & the TG up good & let 'em hang for a few days.
FIE 1858 Frame Oiled .jpg

I almost forgot a detail:
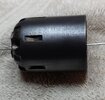
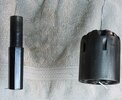
FIE 1858 Brass Grip Ferrules.jpg

Getting the non-threaded grip panel ferrule out was a ...! But it came out without bloodshed. You guessed it; soup city!
FIE 1858 Grip Ferrules in Solution.jpg
They came out fine after 2 dunkings, but the picture didn't.

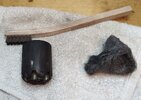
I still have to strip & refinish the grips; turns out I didn't have any citrus strip left after all. Then there's the quick release arbor pin retainer to finish (my brass stock came in, so I may make one each, steel & brass), and the faux case hardening finish and/or heat blue to do.


But here is where it stands this Christmas Eve.

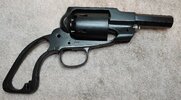
FIE 1858 Black & Blue Right Side.jpg

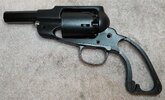
FIE 1858 Black & Blue Left Side.jpg

Hard to believe that's brass! The quality of the blackening is fine. However, I'm doubtful as to the durability of it. I doubt I'll clear coat it, since I've already oiled the heck out of it, so I'll just try it as is and see how it holds up.

Merry Christmas!
 
Not a whole lot of progress lately, but I did work on sizing & basic fitting of the quick release. I'd bought a pack of replacement mini hacksaw blades at Ace, same place & brand I'd gotten before; new blade didn't cut a quarter inch! So I poked around the fabulous internet & got some metal-designated blades that wound up working great.

Shaped the profile
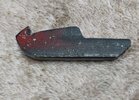
FIE 1858 Quick Release Roughed Out.jpg

Flattened & "regularized" the edges ... sorta
FIE 1858 Quick Release Shaping.jpg

I was test-fitting as I went
FIE 1858 Quick Release Fitting.jpg

The last picture was taken on the first fit. Afterwards, I filed away more of the "tooth" on the catch. It's now a vertical almost-flat where it contacts the end of the arbor pin.

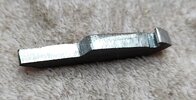
Next, I changed the angle of the QR's top flat to mate better with the arbor pin's flat bottom in the locked position. The angled space you see here is no more.

1858 QR Detail.png

When testing for pivot (without a pivot axis yet), I realized I had to adjust the height of the QR and the angle of the lower flat. I narrowed it a good bit, and now it has enough room to pivot enough for the arbor pin to clear the retainer hook.

I then marked the screw hole with a Sharpie, took the QR out & gave the spot a good dimple with an automatic centerpunch. I'll drill that hole on the drill press, which is in storage, soon. I still have to locate the closing spring, detente, and pin; that will go on the top of the lower flat (detente will be a small recess in the underside of the arbor pin channel). Then I can do a final fit & function check.

I need to whip up a pair of grip blanks! They gonna go on a road trip. :)
 
Eureka! I found it!

The screw that holds the hand to the hammer.
FIE 1858 Hand Screw Found!.jpg

Shortly after that last post, I decided to reassemble the guts & test basic function. I've been keeping all the steel parts in one of those magnetic trays, but neither it nor the trigger guard retaining screw were in it... or on the bench... or on the floor, under the bench. Uh-oh.

I went through my pics,and the last time I have evidence of its existence was in the ramekin of rusted parts that all the alcohol degreaser had evaporated from. Since all of those had gone back into an Evaporust bath, I thought maybe I'd missed them while straining it back into the container? Straining the Evaporust out of the 1/2 gallon container said Nope. Figgered I'd poured it down the drain unwittingly. :(

One last effort: off to Harbor Freight for an extendable magnet! Flat on my belly on the floor, magnet under the bench, sweep the baseboard, and Hurrah! Magic lodestone sucked it out from under a small gap btw the baseboard and the flooring!

Worth every bit of inhaled lint.

Now I gotta find or order a TG screw... but that's probably a more readily available (and standard thread pitch) item than a one-off specialty screw sourced from an obscure Italian shop by a slap-dash early 70's assembler sold through a defunct importer.
 
Back
Top Bottom